Showing posts with label decorations. Show all posts
Saturday, October 12, 2013
Spooky home and eye balls
Spooky skeleton and spooky mice hanging out on top of my favorite bad painting of mine. This painting is not that great. I painted it when I was first getting a hold of how to paint back in like... 2008? But I love it because I'm super narcissistic and enjoy having large pictures of myself around. BUT REALLY, I love it because that's me eating batter or icing or something yummy off of a beater at like age five. Nothing has changed. That's still me, I do that ALL THE TIME. I think my mom still has that mixer? Or maybe my sister broke it recently... regardless. This painting is in our dining room and is the only painting of mine I've ever hung in our home.
This spooky cat was a gift from Brendon when we lived in Denton, because I am that weirdo that loves holiday decorations as gifts. As a surprise he just left it on my desk for me to find and I basically peed my pants in fright when I saw it. Which makes zero sense because it is clearly quite awkward and not scary. But I love it and every year I set it out I laugh about how foolish I am.
And this has nothing to do with Halloween, but guess what? I got contacts!
Or a contact I should say. The vision in my right eye is almost perfect, my left eye is the janky one. So I'm just wearing one contact. It's a little awkward but I'll take it! It's nice to not be a four eyes all the time. Brendon said to me the other day, "I forgot how pretty your eyes were", and boom, that is why I got contacts. I love my glasses, but I feel like that's all people see when they look at my face. Which is awesome when I'm extra sleepy and don't want people looking at my face, but sometimes I'd like to just be me, sans specs. And, hello eye make up? I haven't worn you in like a year. You are so fun.
This post was extra rambly and I apologize and I'm going to just end it right here. I just woke up from a nap. Whatever.
Wednesday, October 2, 2013
Halloween bunting
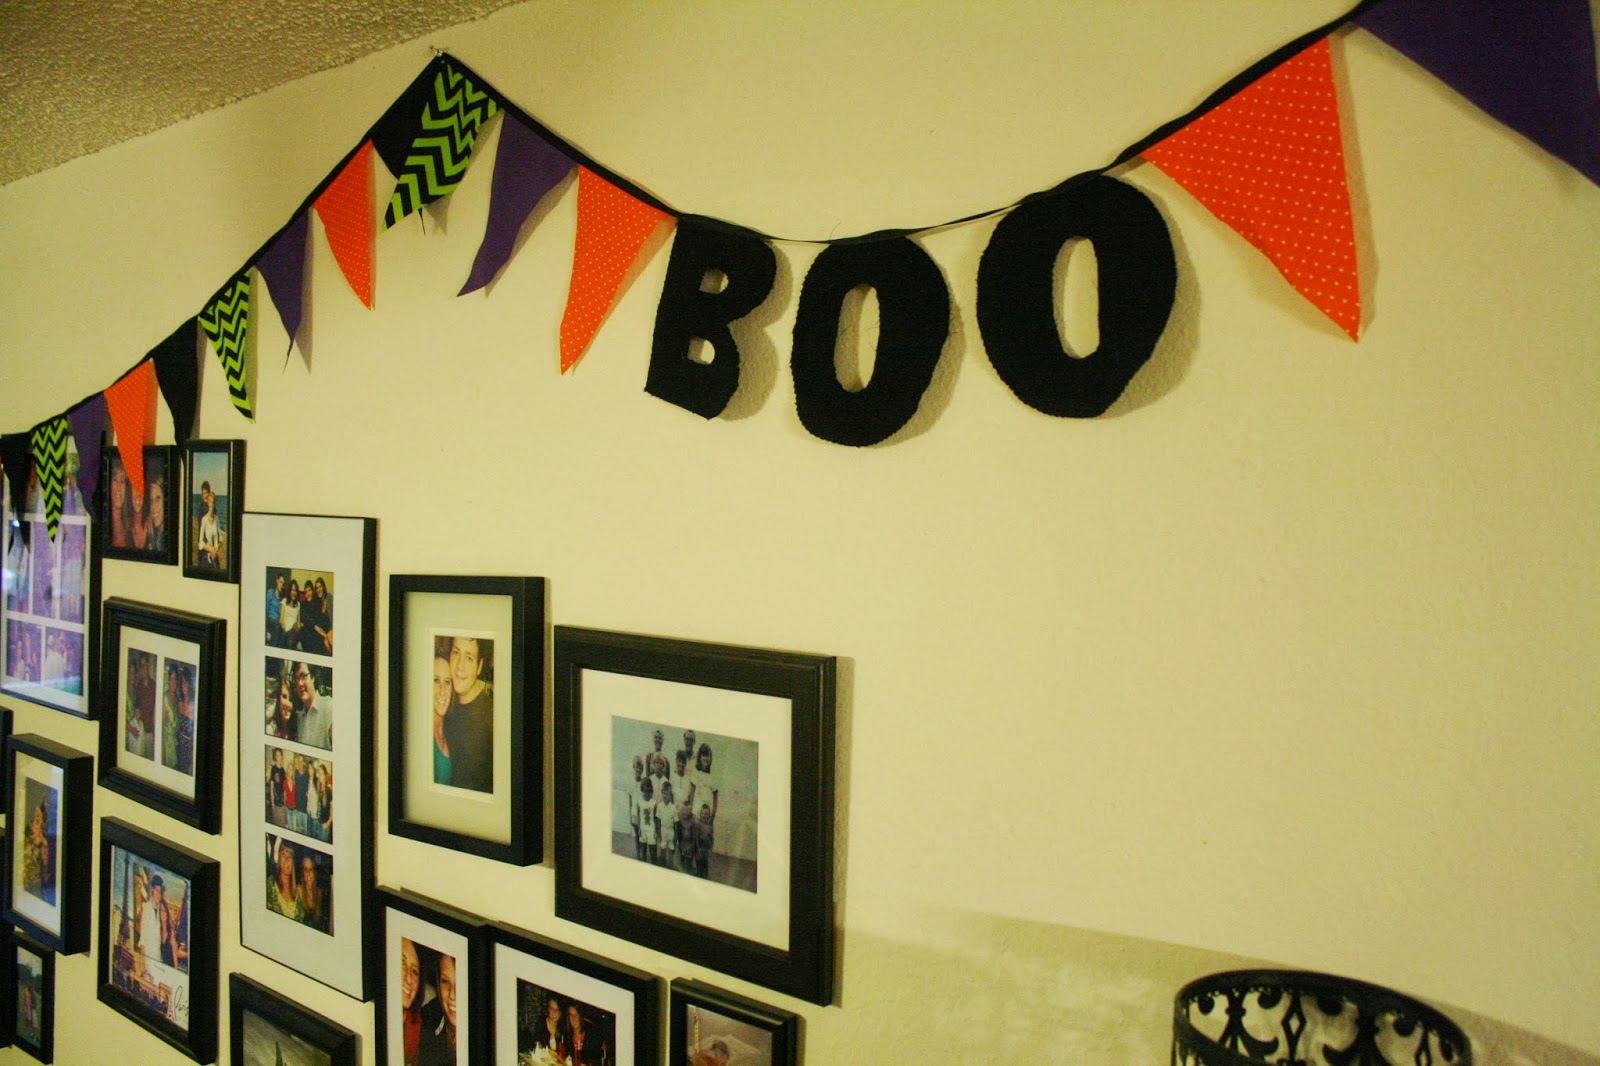
Halloween bunting, because why not? A couple weeks ago I got wild and bought Halloween fabric because it was on sale and because October marks the beginning of the sewing season for me and I needed something to get my feet wet after not touching my sewing machine for a good half year. After sewing on fancy machines for months my little guy took some getting used to. I'm still reaching for things that don't exist, but I'm back in business!
There are more detailed instructions on how to throw together some bunting here, I only varied from that slightly this go around. I added the words "BOO" of course, and instead of just sewing it together triangle to triangle, I sewed a black ribbon across the top. It adds a bit more stability and it's cute!
For my letters I just printed out an outline of big letters via Microsoft Word and then used them as stencils. I also had grand plans of including a bat, but I gave up on that fairly quickly. Cutting it out was such a huge pain, I couldn't wrap my mind around sewing it.
So typical. Sophie is exciting that sewing season has arrived. Fur on all the fabric.
So my letters wouldn't unravel, I zigzag stitched around the edges. I also created a pattern with my colors this time around. Because Halloween is organized like that.
I ran out of ribbon like five triangles before being done and had to go out and grab some more. That right there is the story of my life.
I think it's real fun! I love the colors! The orange and green were "Halloween" fabrics but the purple and black are just the cheapest of the cheap broadcloth. You could totally do it all in broadcloth, and in fact I recommend it. It almost works better, the orange and green are prints so they are only usable on one side. A fully colored fabric is probably your best bet. I'm just a sucker for fun prints.
And isn't this guy the sweetest? While unloading the Halloween decor, I found him. I think he's from Target, and I guess we got him last year. It's always so fun getting all the decorations out, especially when you have a terrible memory like me and forget what decorations you have. It's like Christmas... but Halloween! Busting out the Halloween gear was the first thing I did yesterday morning, I was just a TAD excited about it finally being October and it finally being acceptable to get spooky!
Labels:
bunting,
crafts,
decorations,
Halloween,
halloween bunting,
sewing
Sunday, February 17, 2013
DIY Bunting
Bunting. It's everywhere these days. All over the internet like cats. I don't allow myself to get onto Pintrest (we all know I'd be sucked in and disappear for weeks) but I'm sure it's on there. It's cute, it's fun, and it's super easy (and cheap!) to make. I made miles of it for my wedding:
Today as I was swapping out my V-day heart with my St. Patty's Day clovers outside our door I realized outside of that we have zero St. Patty's day decor! It's a brief holiday but still, I love holidays, big and small. Celebrations in general are awesome in my book. So I decided to make some green bunting to hang around the house. And I thought I'd share how to make it. Because it's stupid easy and if you're ever in need of some cute quick decor, bunting is a great solution.
All you need is some sort of card-stock/sturdy paper, a ruler (or if you're good at eyeballing, forget the ruler), scissors, sewing machine/needle and thread, and fabric. I happen to have a plethora of scrap fabric so I just grabbed all my greens. You can buy your own if you're not sitting on a cache of scraps, remnants would be a good and cheap place to start. Any color is cool! Matching is not necessary! I ended up not using that green polka dot print fabric since it was a print and not double sided. Something to consider if your bunting will be seen from both sides.
Make yourself a triangle! My sturdy paper was a flyer we got in the mail, recycle y'all! This will be your pattern. Mine was 6 inches across and 7 inches down, but you can make them whatever size you'd like! Long and skinny triangles or short and fat, you're the boss.
Trace your pattern on your fabric! I folded my fabric in half a whole bunch so when I cut it I was cutting multiples. Don't worry if they're not perfect, perfection is totally overrated in this instance. And in most.
Kick your cat off your stuff and continue with the rest of your fabric until you've got a whole bunch of triangles!
Now sew those suckers together! You can sew them in a pattern or just grab random colors, as I did here. A sewing machine surely speeds things up, but you can totally do this by hand. You just need the corners to be sewn together. If you do have a sewing machine, you can just run a stitch along the top of all of them.
And before you know it, you've got a big ol' strand of bunting! It took me maybe 10 minutes to sew them all together.
I ended up going back and finishing the edge with a wide zig-zag stitch for a little more stability. You could totally sew the whole thing together like this from the start, if I had thought of it earlier I would have. Have a serger? Lucky you, serge them all together!
You could also connect the triangles together with one long ribbon across the top. Perhaps in a contrasting color? I think that would be super cute. Plus, you could leave a long bit of ribbon at each in to tie your bunting to things. Ribbons = bows, y'all.
Hang that nonsense up and get festive! I made a loooong strand. This actually goes a bit farther off to the right. It makes me happy! Our little home is ready for St. Patty's day!
Make some y'all! Or don't, I will never know. But like I said, it's SO easy and incredibly cheap. You could probably throw this together for under five bucks if you had to buy all the materials. And it looks great and is so fun. Baby showers? Birthdays? Christmas (I am shocked I don't have this in christmas colors, obv going down this year)? Or just have some up year round! Why not? The options are endless! Get crafty!
Today as I was swapping out my V-day heart with my St. Patty's Day clovers outside our door I realized outside of that we have zero St. Patty's day decor! It's a brief holiday but still, I love holidays, big and small. Celebrations in general are awesome in my book. So I decided to make some green bunting to hang around the house. And I thought I'd share how to make it. Because it's stupid easy and if you're ever in need of some cute quick decor, bunting is a great solution.
All you need is some sort of card-stock/sturdy paper, a ruler (or if you're good at eyeballing, forget the ruler), scissors, sewing machine/needle and thread, and fabric. I happen to have a plethora of scrap fabric so I just grabbed all my greens. You can buy your own if you're not sitting on a cache of scraps, remnants would be a good and cheap place to start. Any color is cool! Matching is not necessary! I ended up not using that green polka dot print fabric since it was a print and not double sided. Something to consider if your bunting will be seen from both sides.
Make yourself a triangle! My sturdy paper was a flyer we got in the mail, recycle y'all! This will be your pattern. Mine was 6 inches across and 7 inches down, but you can make them whatever size you'd like! Long and skinny triangles or short and fat, you're the boss.
Trace your pattern on your fabric! I folded my fabric in half a whole bunch so when I cut it I was cutting multiples. Don't worry if they're not perfect, perfection is totally overrated in this instance. And in most.
Kick your cat off your stuff and continue with the rest of your fabric until you've got a whole bunch of triangles!
Now sew those suckers together! You can sew them in a pattern or just grab random colors, as I did here. A sewing machine surely speeds things up, but you can totally do this by hand. You just need the corners to be sewn together. If you do have a sewing machine, you can just run a stitch along the top of all of them.
And before you know it, you've got a big ol' strand of bunting! It took me maybe 10 minutes to sew them all together.
I ended up going back and finishing the edge with a wide zig-zag stitch for a little more stability. You could totally sew the whole thing together like this from the start, if I had thought of it earlier I would have. Have a serger? Lucky you, serge them all together!
You could also connect the triangles together with one long ribbon across the top. Perhaps in a contrasting color? I think that would be super cute. Plus, you could leave a long bit of ribbon at each in to tie your bunting to things. Ribbons = bows, y'all.
Hang that nonsense up and get festive! I made a loooong strand. This actually goes a bit farther off to the right. It makes me happy! Our little home is ready for St. Patty's day!
Make some y'all! Or don't, I will never know. But like I said, it's SO easy and incredibly cheap. You could probably throw this together for under five bucks if you had to buy all the materials. And it looks great and is so fun. Baby showers? Birthdays? Christmas (I am shocked I don't have this in christmas colors, obv going down this year)? Or just have some up year round! Why not? The options are endless! Get crafty!
Labels:
bunting,
crafting,
decorations,
diy,
holidays,
home,
sewing,
st patricks day
Saturday, October 1, 2011
Happy October!
We were welcomed into October with a lovely morning of coolness, even now it's only in the 80's! THE EIGHTIES! Not the 90's or 100's. It's so lovely. I think it's time to start sittin' on the porch in the evenings! Maybe I can convince Brendon to do some studying out of doors.
Today I decorated for Halloween. I had been waiting all week for it to be officially October so I could do so, and I'm surprised I made it. Decorating for holidays, or doing anything holiday related, is a passion of mine as I'm sure you all have gathered.
This ridiculous cat is my favorite of our decorations. Brendon got it for me a couple years ago. He brought it home from work one day and sat it on my desk to surprise me. It took a few minutes for me to realize it was there but when I did it scared the bejeezus out of me. I'm pretty sure I shrieked, which is very appropriate for Halloween. Mission accomplished, weird sparkly cat. I added a bow to make it cuter. Bows on everything y'all. Everything.
Also, this happened today. Orange toe pumpkin toe nails! That pumpkin was insanely hard to draw with a toothpick and cheap-o black nail polish. So hard I could only do it once, hence the lonely left big toe.
I hope that October is good to you dear readers. The wonderful season of fall is upon us! Enjoy it people.
Today I decorated for Halloween. I had been waiting all week for it to be officially October so I could do so, and I'm surprised I made it. Decorating for holidays, or doing anything holiday related, is a passion of mine as I'm sure you all have gathered.
This ridiculous cat is my favorite of our decorations. Brendon got it for me a couple years ago. He brought it home from work one day and sat it on my desk to surprise me. It took a few minutes for me to realize it was there but when I did it scared the bejeezus out of me. I'm pretty sure I shrieked, which is very appropriate for Halloween. Mission accomplished, weird sparkly cat. I added a bow to make it cuter. Bows on everything y'all. Everything.
Also, this happened today. Orange toe pumpkin toe nails! That pumpkin was insanely hard to draw with a toothpick and cheap-o black nail polish. So hard I could only do it once, hence the lonely left big toe.
I hope that October is good to you dear readers. The wonderful season of fall is upon us! Enjoy it people.
Subscribe to:
Posts (Atom)